
Intro
Have you ever wanted a chance to dive into suspension tuning and repair? Below is the transcription of the Shock Tuning and Repair Seminar, one of the workshops from the 2015 Rocky Mountain Snowmobile Expo. This clinic was put on because the folks at Z-Broz volunteered to donate some time, so please thank them! You can visit their website by clicking HERE, or point your web browser to zbrozracing.com.
Video
Transpcript
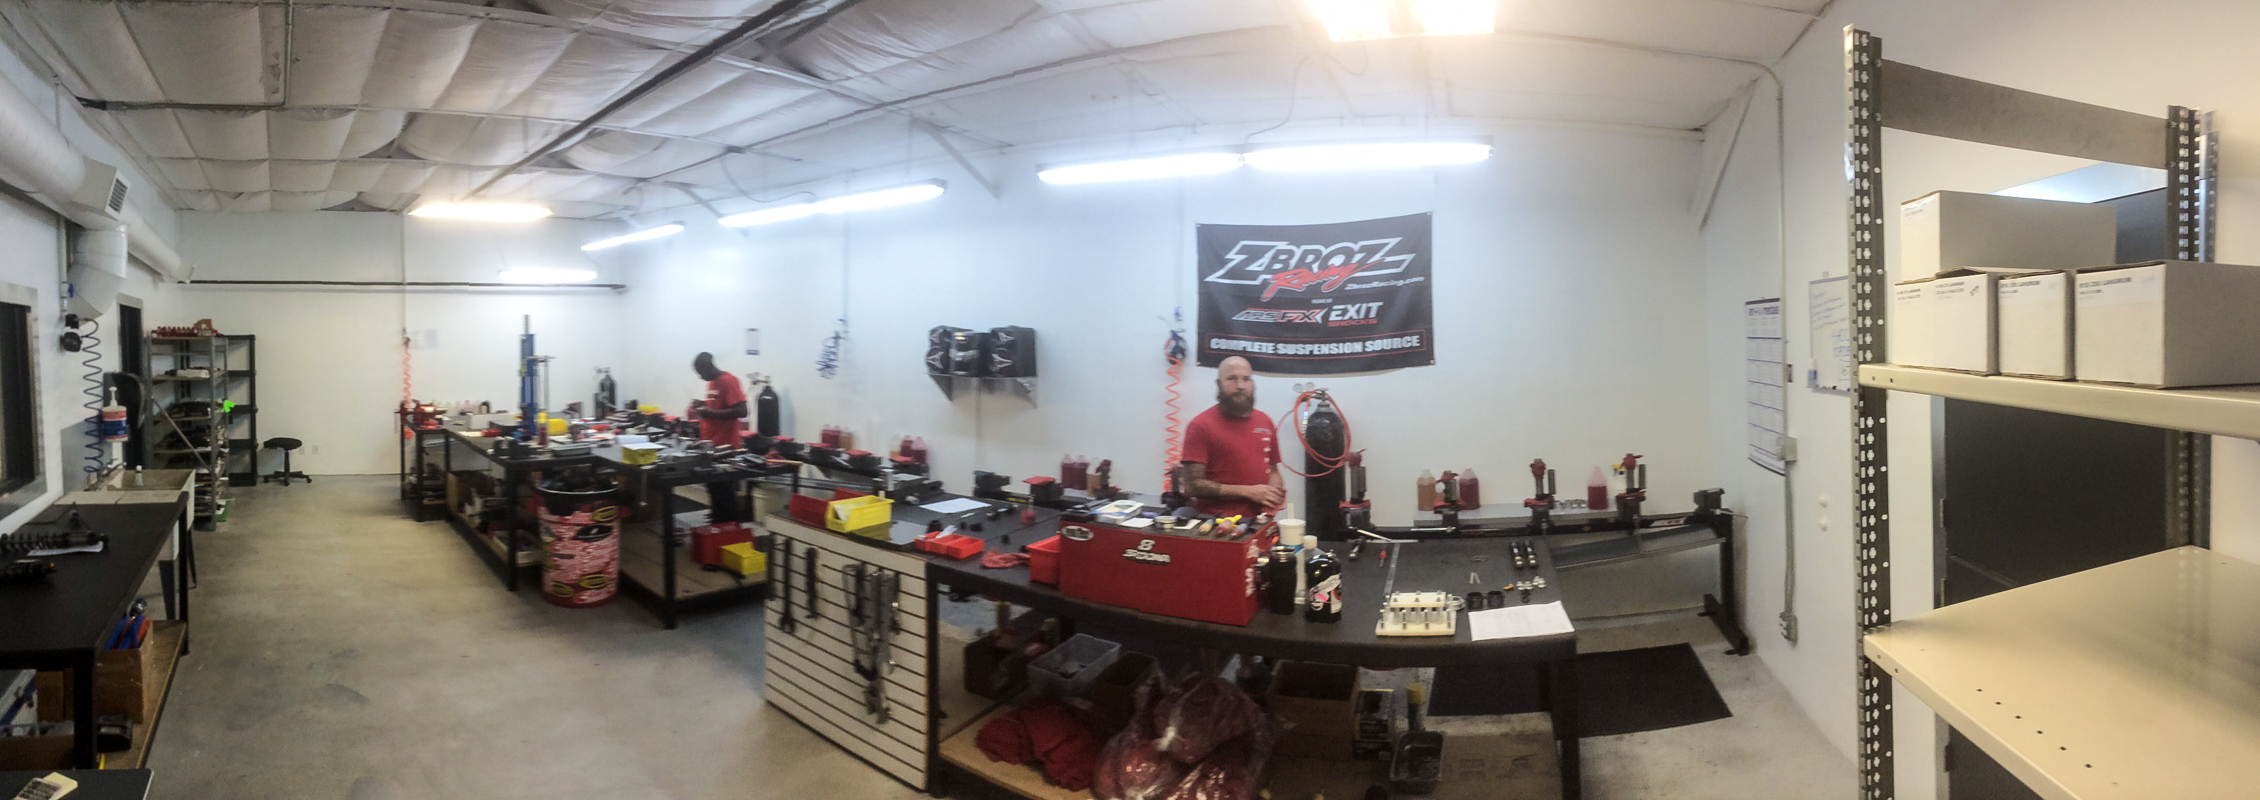
I’m Ryan with Z-Broz Racing. I was asked to come and talk to you guys about tuning your suspension, servicing, etc. I thought we would start with servicing shocks. Has anyone been inside a shock before? There seems to be a theme in the sled industry that servicing your shocks is not required. People feel that shocks should just work, and not need servicing. That’s not the case. Here is an example of used shock fluid. You can see the foreign material that has gotten inside the shock.
Servicing, Part 1
There are a lot of things that can contaminate a shock. They are operating, basically in water, all of the time. You’ve also got cold temperatures, which can draw moisture through the metal and seals. It is extremely difficult to keep the moisture on the outside of the shock from coming in. Moisture breaks the oil down and ruins the seals, leading to shock failure. I’m sure everyone here has ridden on a blown shock at some time. The need to service a shock is very real.
If you want to have them serviced, we always recommend that you send them in. We rebuild and service our shocks for $65 per shock. The usual turnaround is 4 days, but it depends on how many shocks are in our service department at any given moment. A servicing from Z-Broz includes replacement of seals, a full inspection, and flushing/replacing the oil. Not all shocks are serviceable. However, the shocks we build, at Z-Broz, are.
Mechanics of a Shock
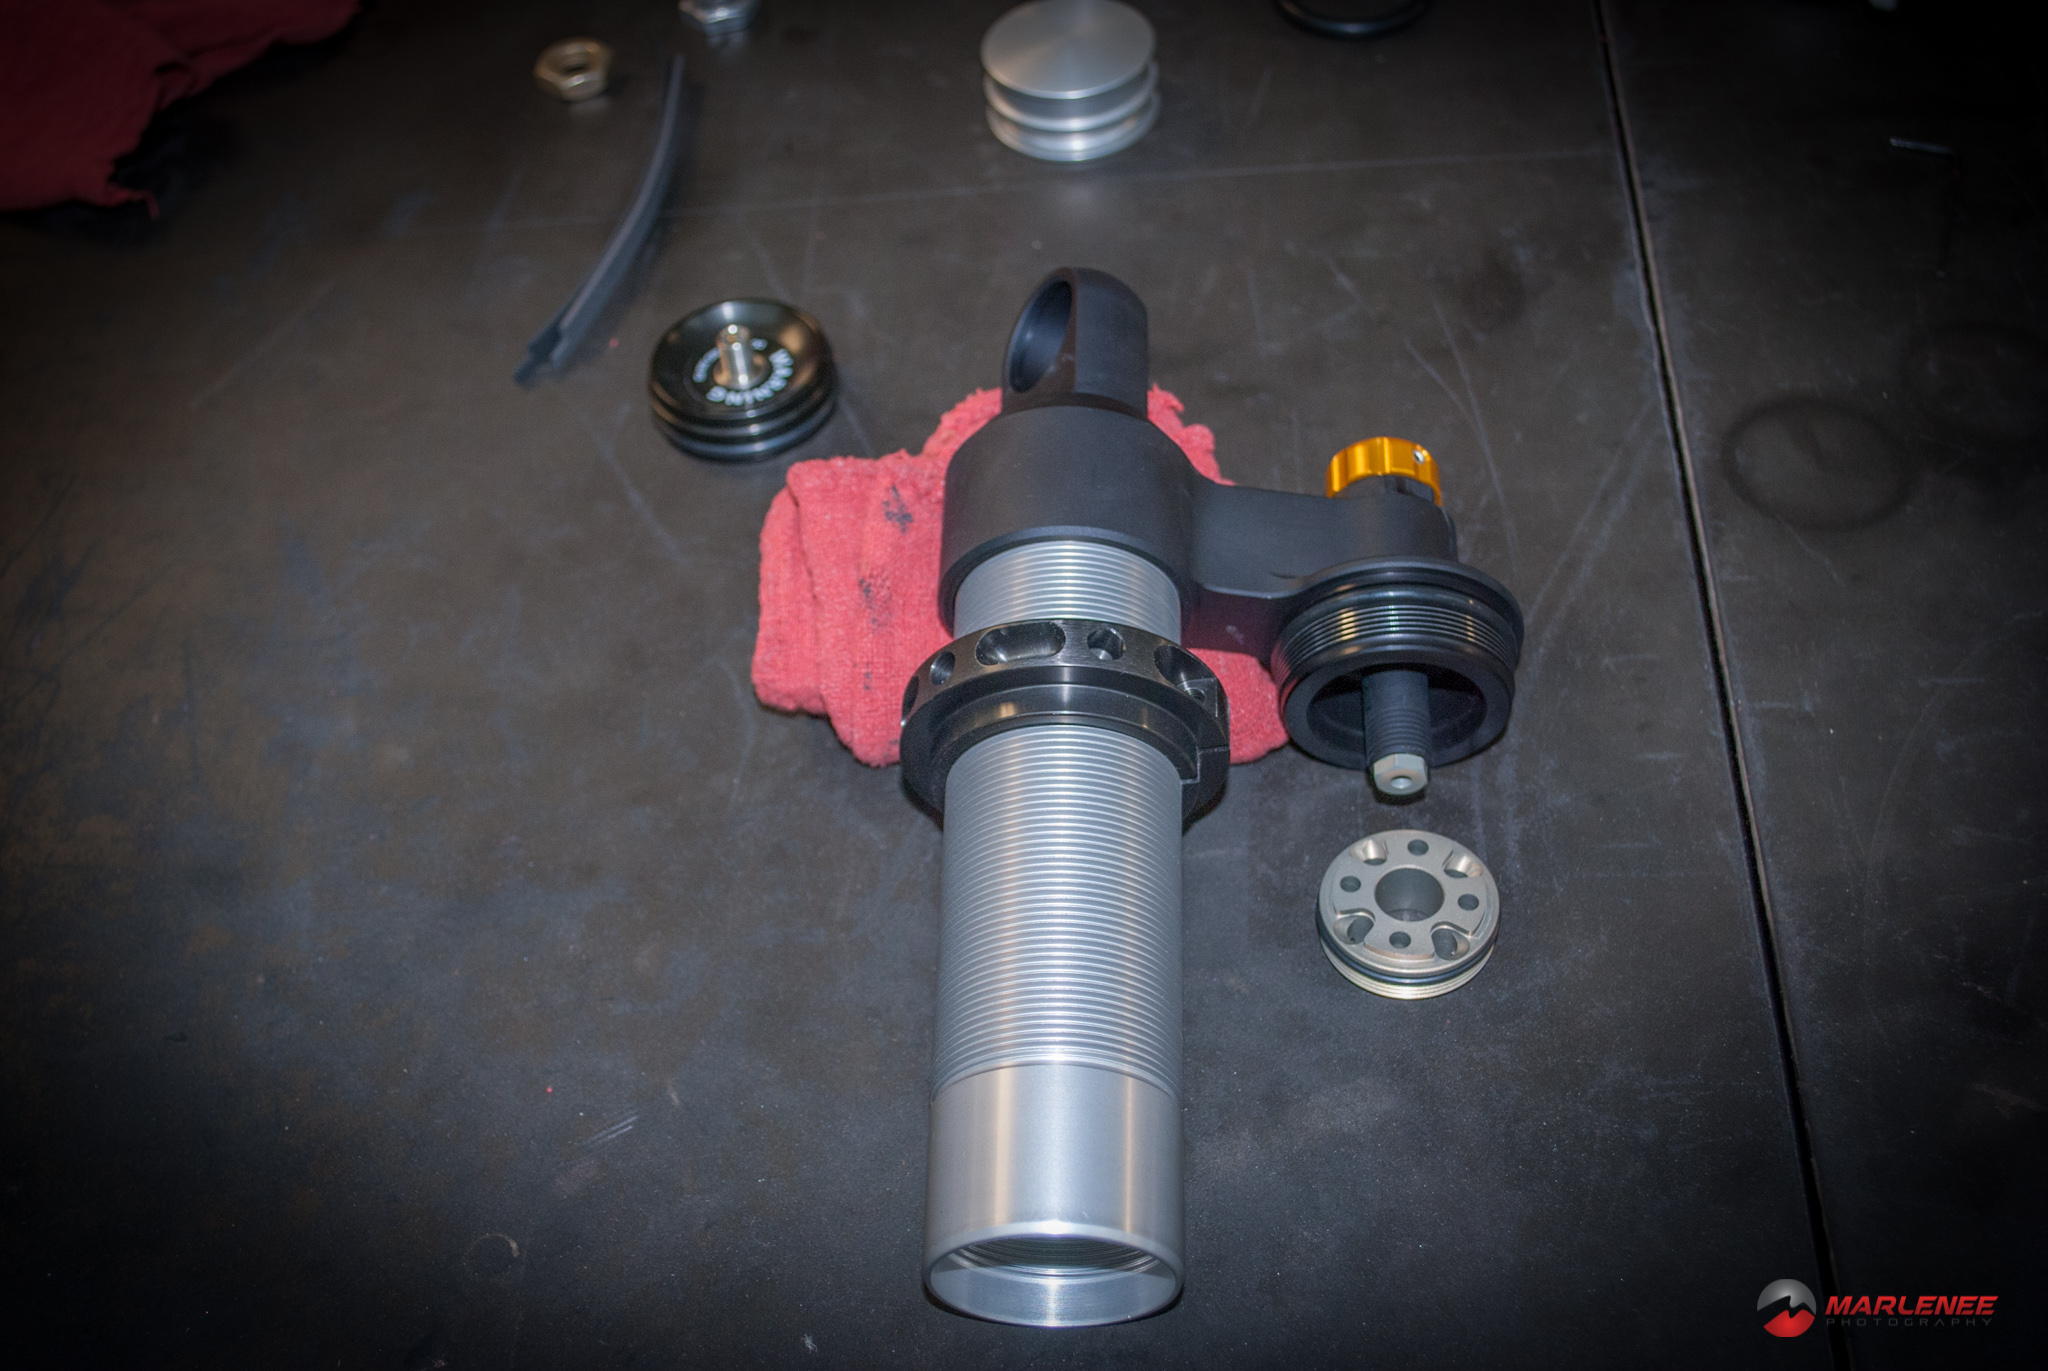
I thought it would be good for everyone to see the inside of a shock. Shocks are a hydraulic cylinder, plus any sort of spring setup. In air shocks, there is an air cylinder that sits over the base, and acts as a spring. Some shocks are threaded together, and some use a snap ring. We’ll take this apart, and give everyone an opportunity to see what’s inside and how it works.
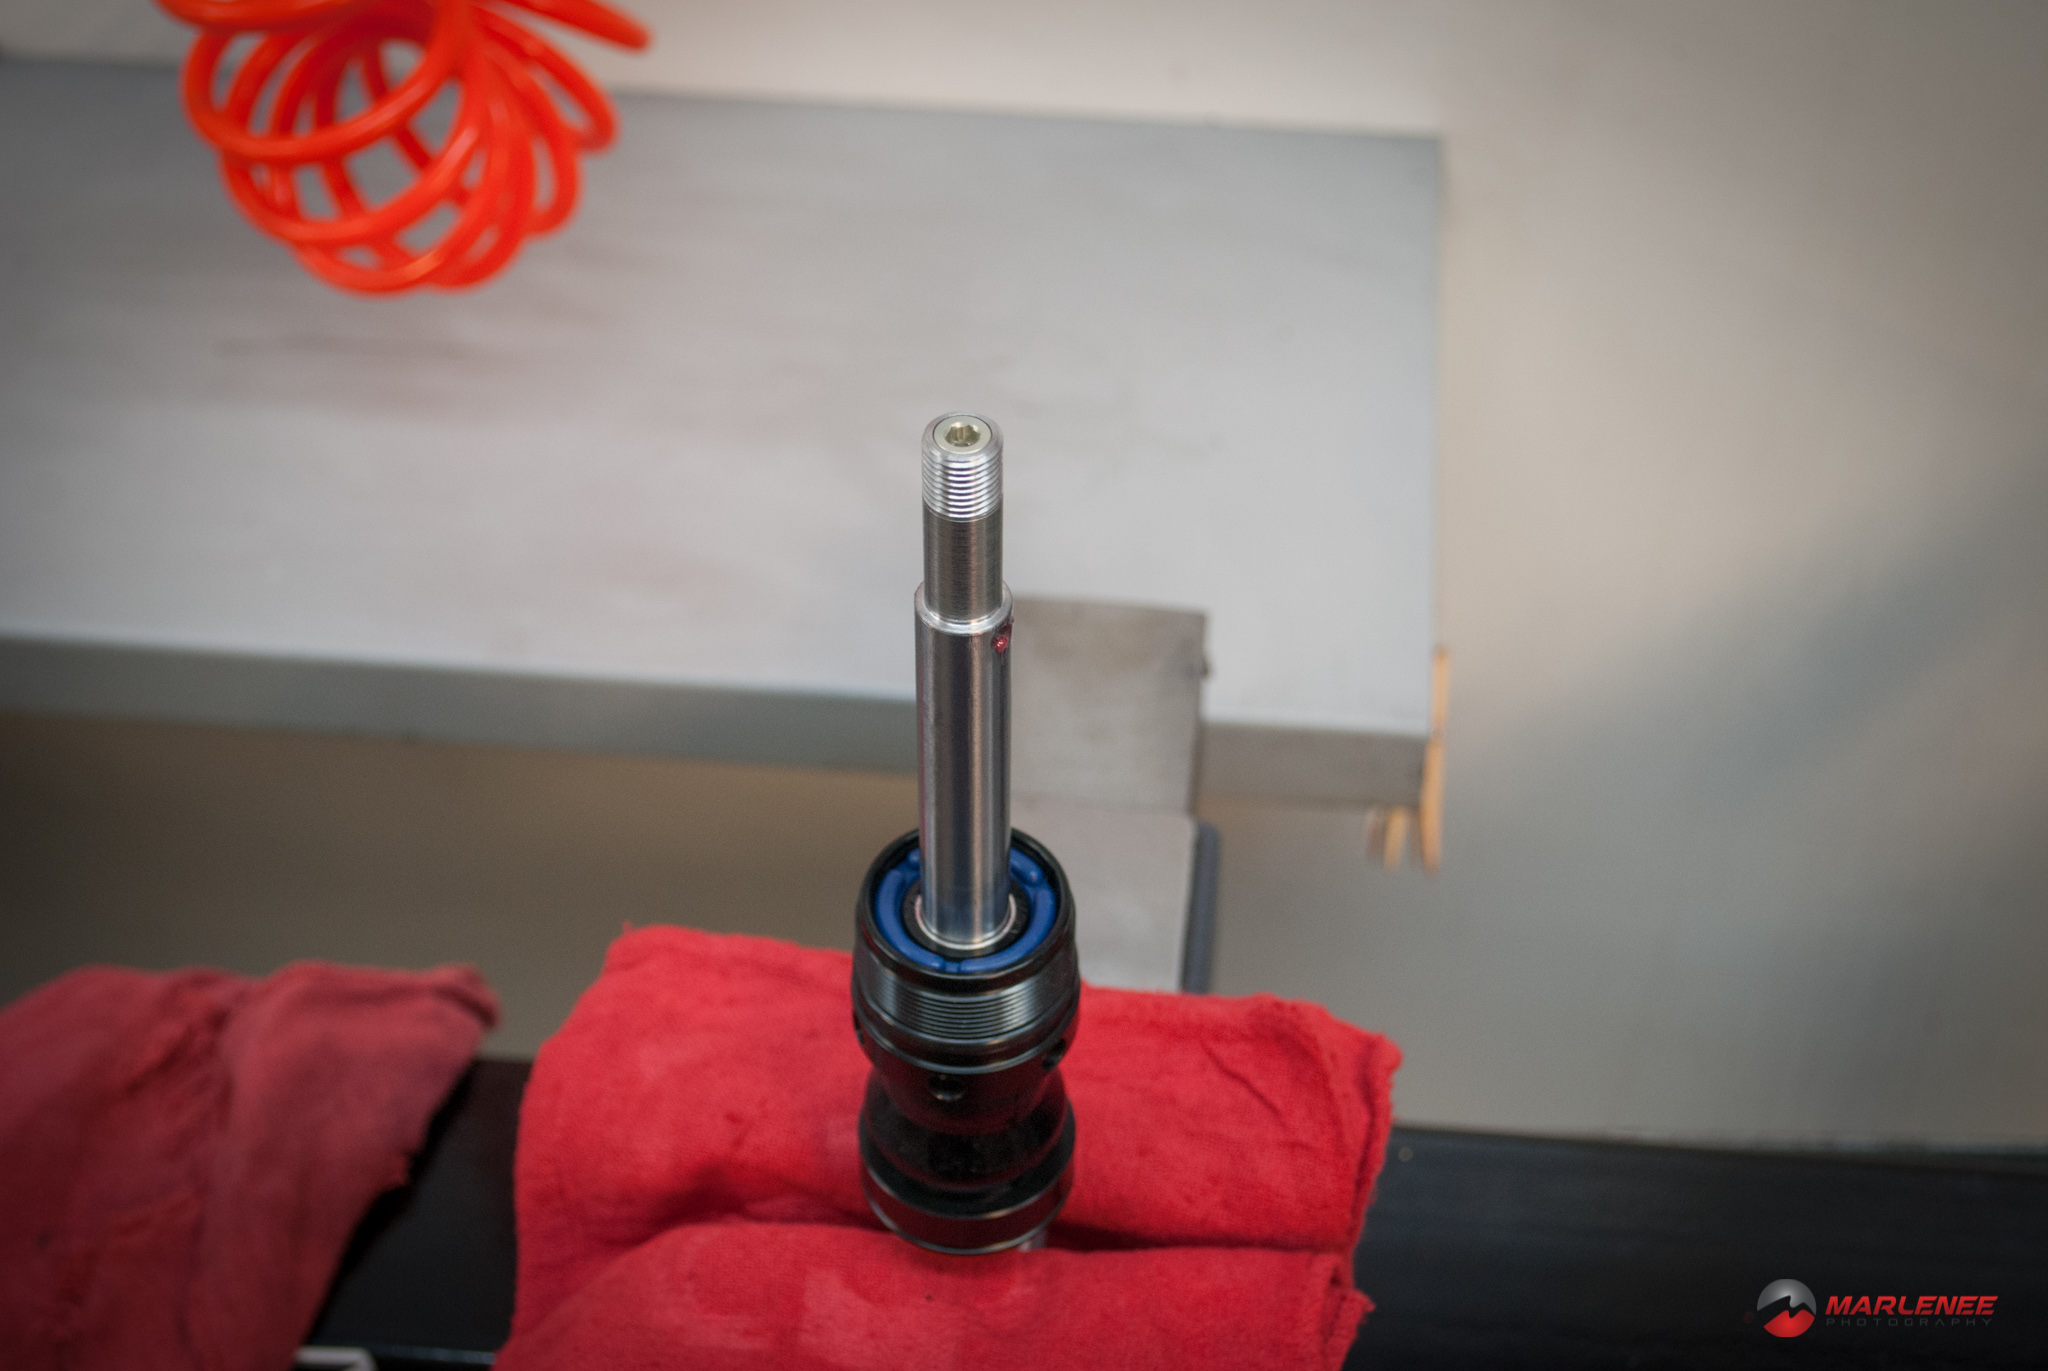
A dampener is not something to be afraid of, they’re easy to service. I’m going to dump the oil out of this brand new shock. On this shock, this is what we call a ‘piggyback’ with two cylinders. One is a nitrogen chamber, and the other is an oil chamber. This design is to take the column of oil that gets displaced and give it a place to store it until the shock rebounds. This model is held together with a snap ring.
In one side of this shock, is an oil column. The other column is filled with nitrogen. You can see the floating piston at the bottom, which is designed to separate the fluid from the nitrogen. Inside of your shock, there is a seal head, to keep contaminates out. The other side, is basically where the ‘magic’ happens.
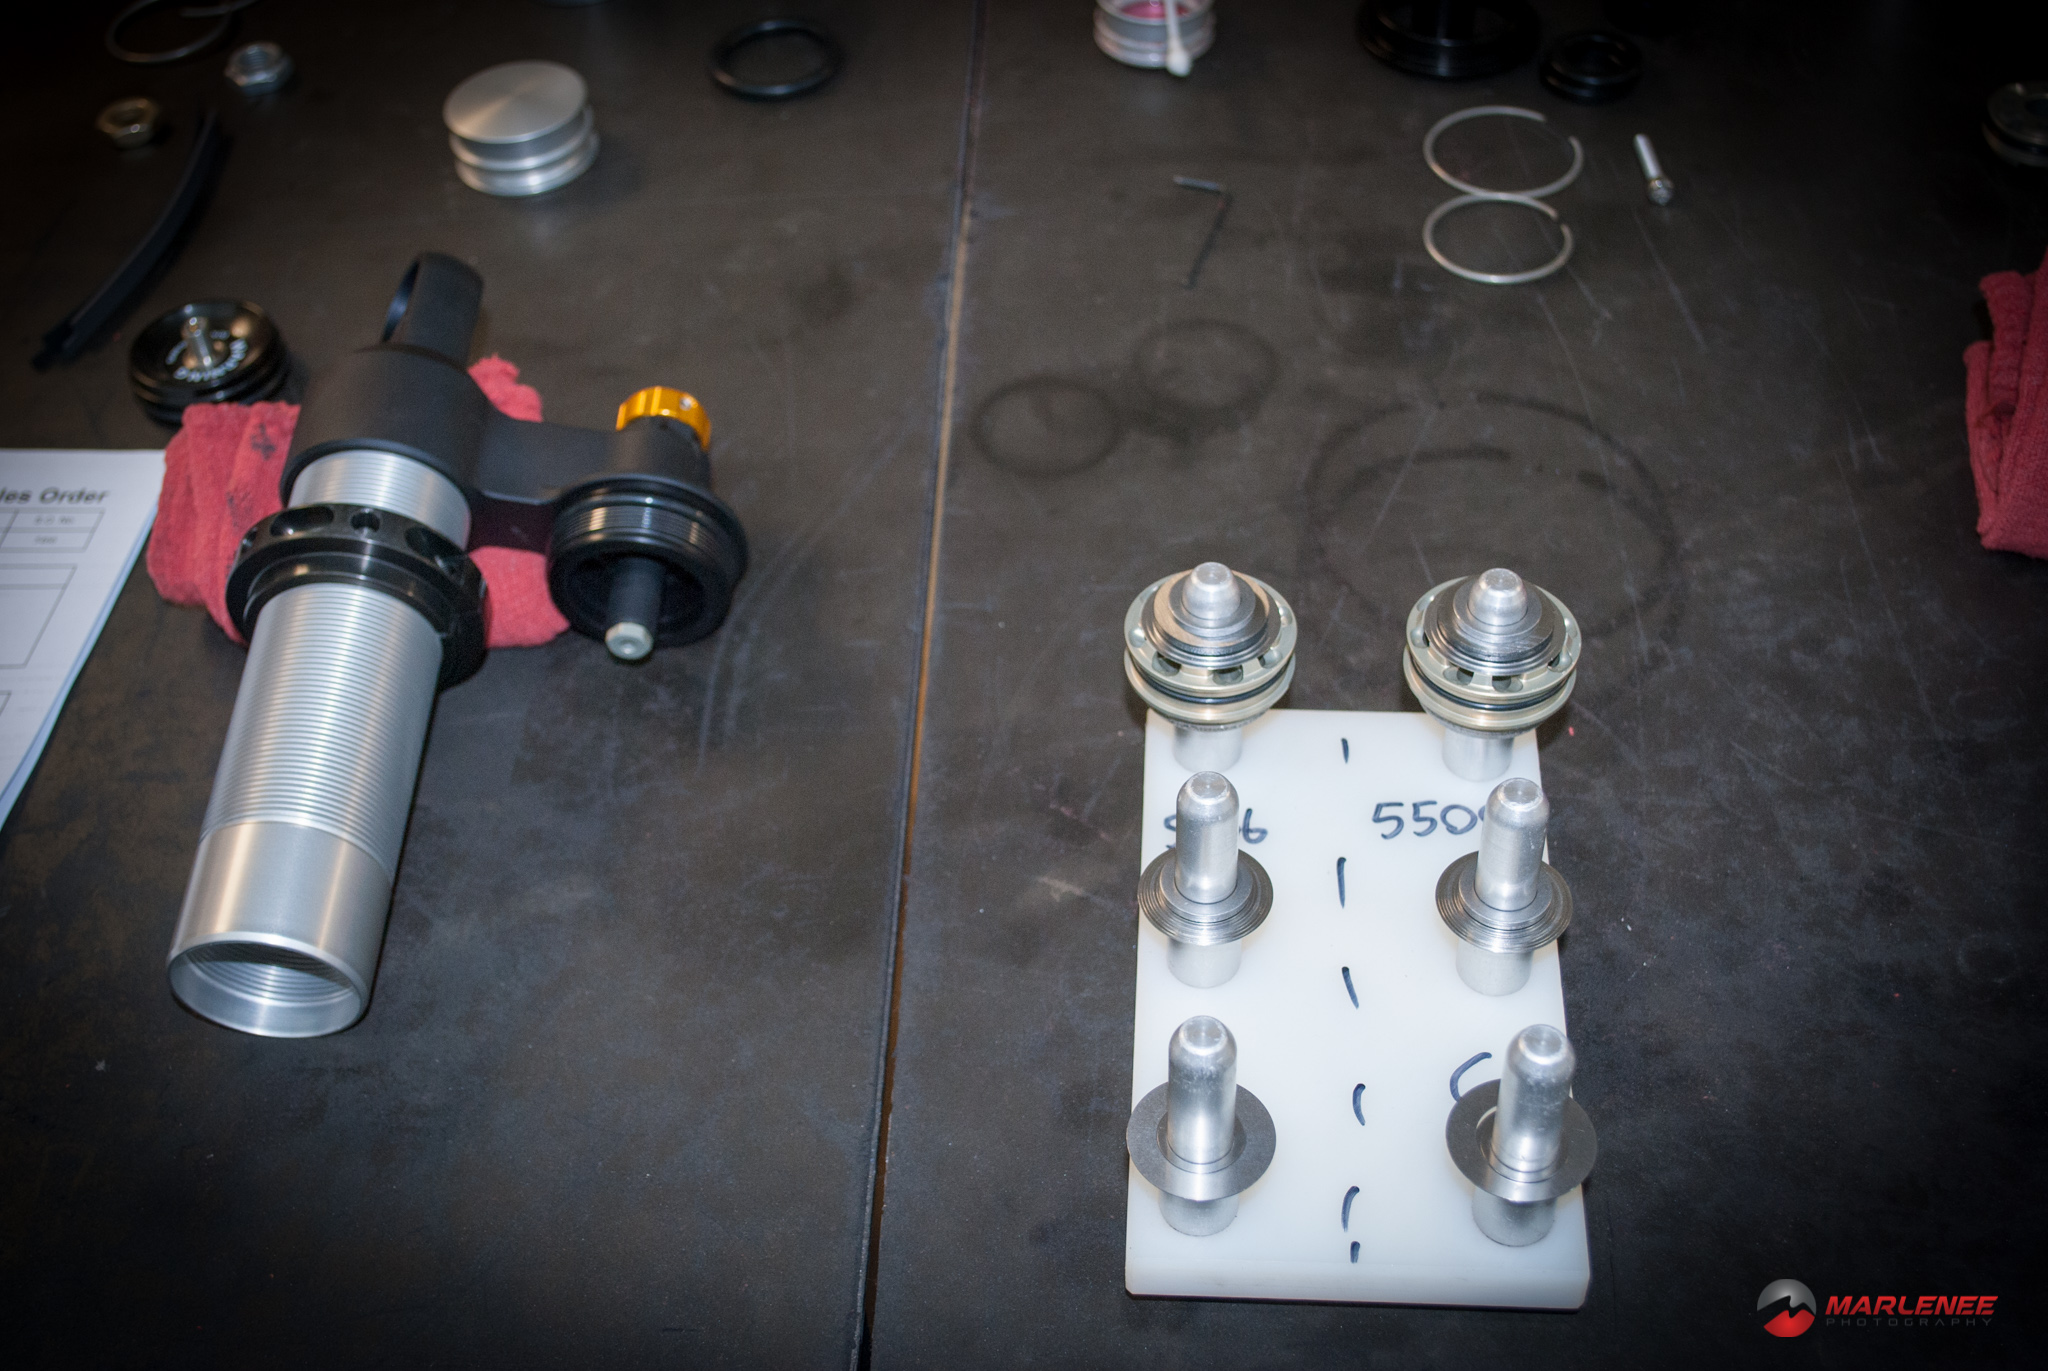
In the main cylinder, you have your main piston, which controls the dampening of the shock. The column of fluid passes through on the compression and on the rebound side. To control the flow of fluid (rate of speed), there are a stack of shims (thin washers), and they vary in diameter and thickness, from 1/1000 to 15/1000. We stack these shims and vary the thickness to control the bend moment (how easily they flex). The stack determines how much force must be applied to get the shim to move. The shims will wear out, but generally after the piston wears out. So you have a stack on either side of the piston, to control compression and rebound. We use this to tune the shock, either progressive or linear.
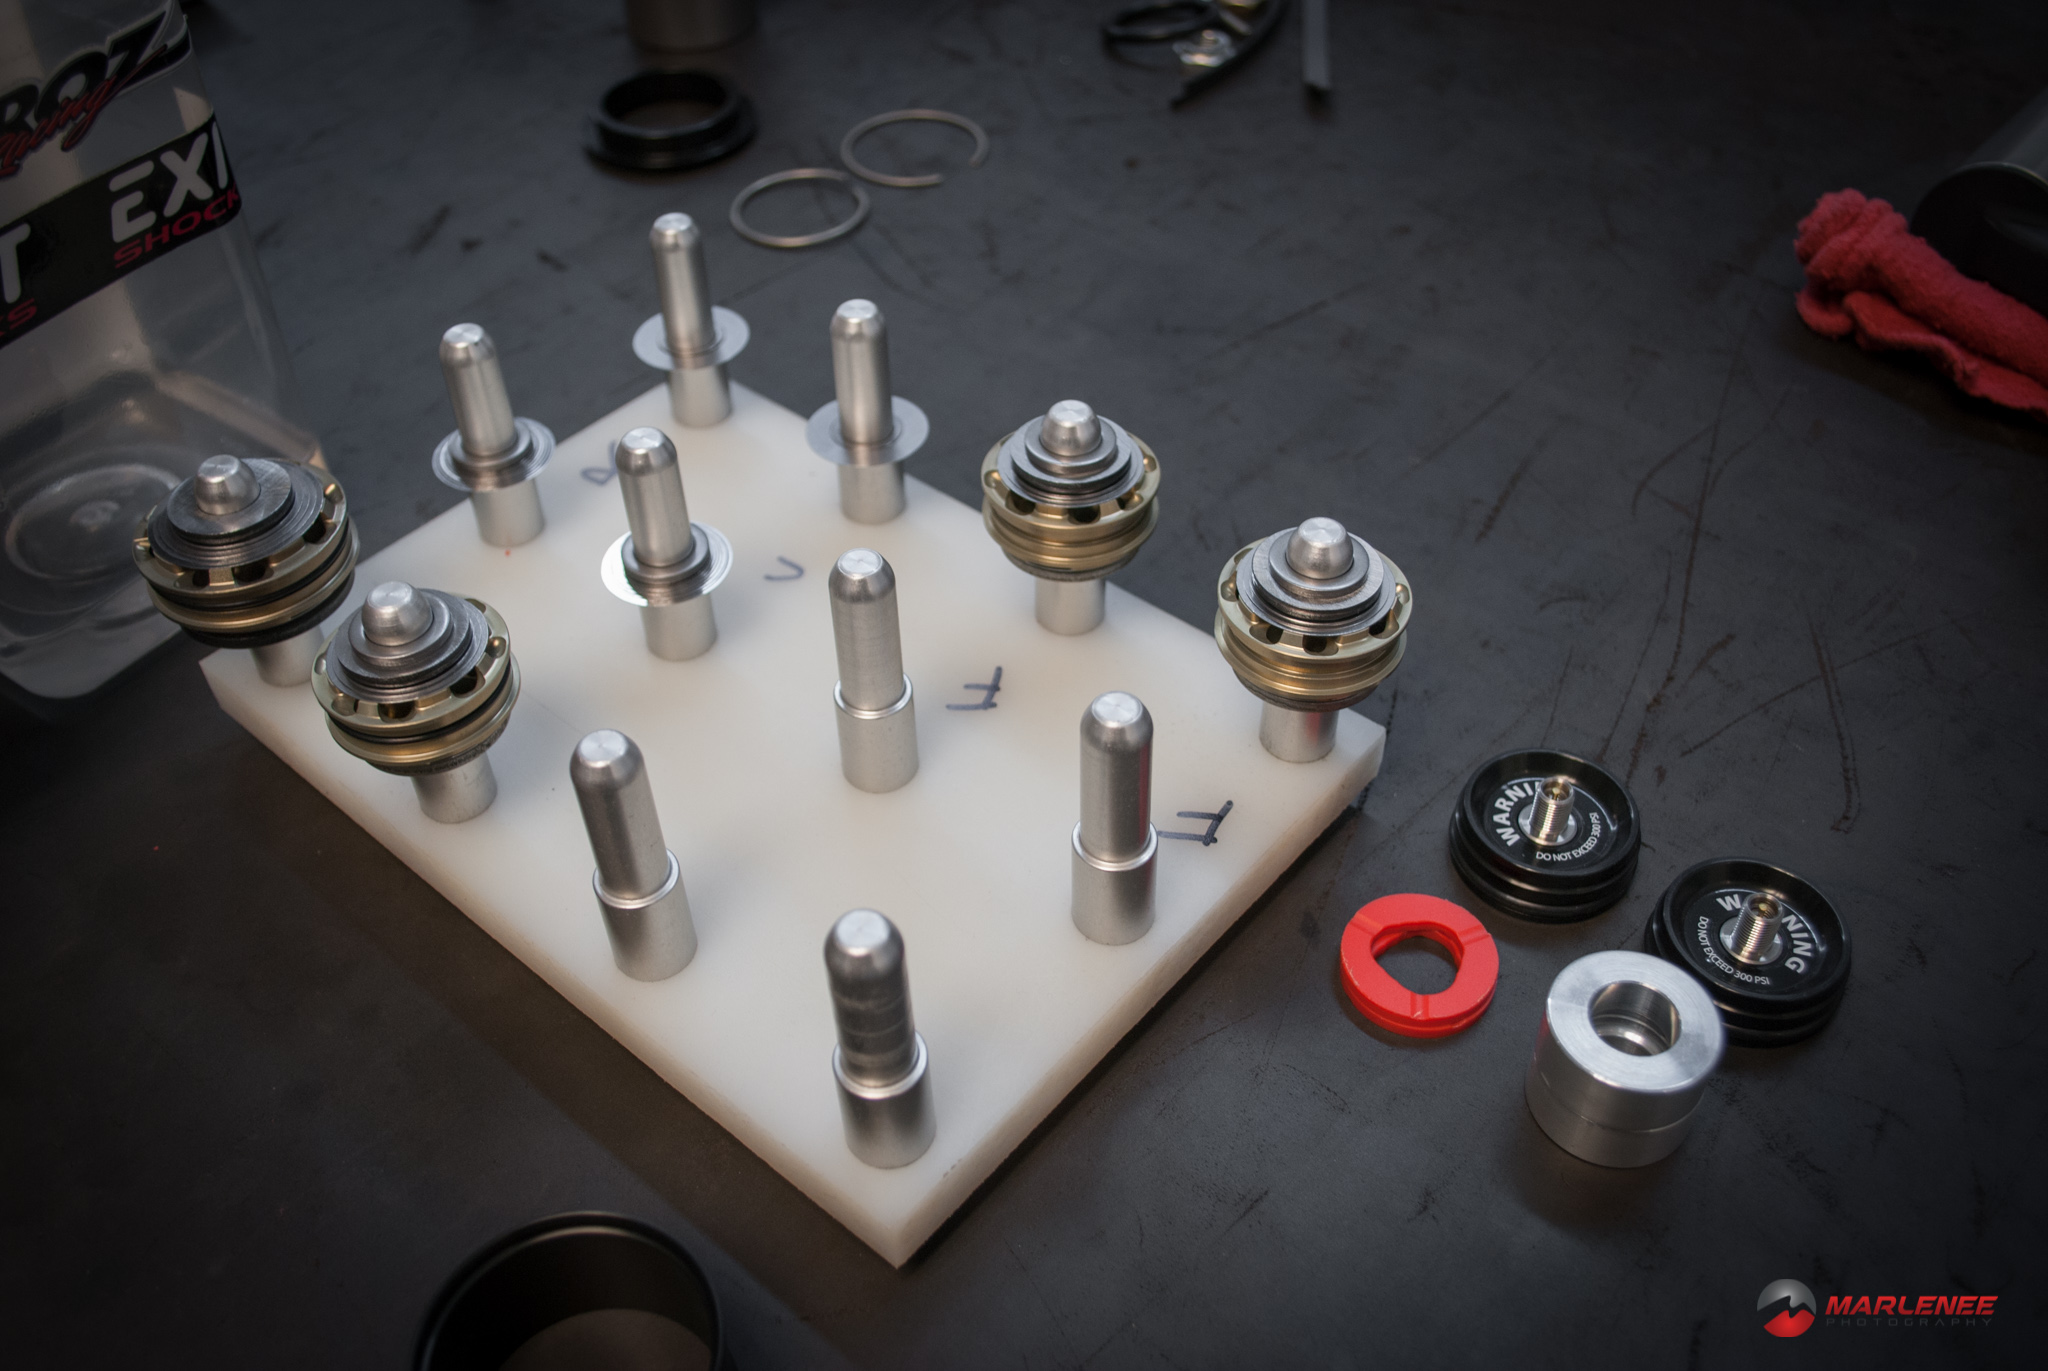
You can also see the wear band, which is Teflon coated. It controls wear between the cylinder and the piston. We are trying to reduce friction, because it causes heat. A normal shock creates a lot of heat, moving such high volumes of fluid through a small space. This wear band is something that we inspect and replace with normal servicing. We also replace the O-ring on the seal head. There are some other wear bands on the floating piston. All of these parts will be included on a service-kit.
Servicing, Part 2
Next, we fill the shock up with fluid. It’s easy to see how much fluid to add. It’s most important to remove ALL of the air from the column of oil, as it affects how the shock works. I fill the oil up to above the threads, and stick the shaft down into the cylinder. The floating piston is now against the bottom of the cylinder. I work the piston to get the remaining air bubbles out. Next you replace the cap on the nitrogen side. You don’t want the piston to start moving as you’re cycling oil through the other side. You want as much nitrogen volume as you can to keep the piston to make contact with the hardware on the oil side of the cylinder. I’m going to simulate nitrogen with air, for ease of this workshop. Air is not the right thing to use. A shock with air won’t perform correctly, if the shock is designed for nitrogen. I’m going to use a hammer to create some
force on the shims to let some oil out. I’m going to hit it enough to ensure all of the air is out. Then, you’re going to pull the piston as close to the top of the column of oil, without drawing air into the shock. Next, you will work the seal-head down. You can start to see the oil bleed around the threads, around the cylinder, and forcing the last of the air bubbles out. In an Exit shock, we set the piston depth for you with an O-ring. Then, you’re going to release the nitrogen out, to remove resistance. Screw the piston all the way in. The O-ring has sealed the column of oil inside the cylinder. It is displacing the fluid to the other side. Now, I’ve set the piston depth, about 100-thousandths. Now, you charge your nitrogen cylinder (again, using air for demonstration). That’s basically it, relatively simple, it just requires the correct tools.
Spring Discussion
Now, let’s talk about multiple-rate springs. At Z-Broz, we use a progressive, triple-rate spring. You can see that essentially, it’s three different springs. It doesn’t matter which order we put them in, but it allows you to more-or-less infinitely tune a suspension. Here, we are using a 100-pound spring with 5 inches of compression. With 5 inches, that’s 500 lbs. of compression, and it’s linear. When you start stacking springs, you introduce a progression of compression. We also use a collar to limit how far some of the springs can travel. By doing that, we change the rate of increase. When you stop one spring from moving so far, you limit it down to two springs doing the work. Next, the second spring will be limited by a collar, and again, you affect the rate. Finally, you’re at the rate of the main spring, only. This technique is what allows us to tune a progressive rate. The key here is that it’s tunable. What one person likes, is different than what the next person likes. With a single spring, you can only change the rate of the spring by replacing the spring, or change the pre-load.
Shock Tuning
In tuning, the first thing you should understand, is that you can have what you want! You don’t have to use what comes from the factory. You can buy bolt on components, and you can adjust factory suspensions. The factory has to build a one-size-fits-all machine, and it’s important that you take the time to research what you can do and what add-on’s or changes are available.
The compression knob, is an external adjustment that allows you to create resistance to the shock. It will restrict or open the flow of fluid through the cylinder. It works similarly to changing the rate of springs, in a basic understanding.
Rebound adjustments are made through the bottom of the shock, if your shock is capable. There is a needle that can affect the flow through the shaft of the shock. We see velocities of 100-inches per second, on compression. The rebound circuit is about 10% of that velocity. Once you get beyond that, you are forcing more fluid than the size of the hole can take. Rebound adjustments will help with small stutter-bumps or hitting a log under the snow. It won’t affect the big hit of dropping off the cornice or bottoming your suspension out.
There is also a bypass on compression, which allows the fluid to bypass the compression adjustment, to deal with the big hits. We refer to this as the high-speed loop. You can get shocks that allow you to make adjustments to basically however you ride, through either external adjustments or the way the shock is built.
At Z-Broz, we build very specific, customized shocks. Before we build your shocks, we ask what sled you’re riding, what kind of riding you do, how much you weigh, how much your gear weighs, etc. This allows us to create baselines and build shocks that fit what our typical customer wants. We want everyone that buys our product to maximize the potential of their sled, to not come home with a sore back, and to not come home with bent parts. And so, we build custom shocks to give each rider that luxury.
Questions
Air vs. Coil-Over?
We are a coil-over company. We believe the performance advantages from a coil-over outweighs the weight advantages of air. Air shocks are not as tunable. You are limited to what kind of an effect you can make, even with secondary changes. Air shocks are susceptible to moisture, altitude, and temperature variations. Those factors make it difficult to precisely tune air shocks. They are lighter, and for some riders, that is the key. Coil-overs allow so much more adjustment in spring rates, and with the fluid adjustments. In the Western riding segment, weight is a factor, and there are better places to remove weight, in my opinion. There is also the factor of ‘stick-tion’. Air shocks have a lot more force on their o-rings to hold the air in. This O-ring sticks to the shaft, and requires more energy to get the shock to move. So, at slow speeds, they don’t perform well at all. On a fluid shock, the stick-tion is only related to the 5/8” shaft, and is a lot less in added force, so these shocks will perform much better at lower speeds than air shocks. Think about the effect of this stick-tion when you’re starting out from a side hill maneuver, relating to the effort to start rolling the sled over to one side.
If you were going to prioritize which shocks you were going to upgrade, give us how you would do that?
It would really depend on the sled. The new AXYS, it has a really good starting suspension rear suspension. However, they are poorly sprung. The AXYS gets up on the snow, really well. For a lightweight rider, you need that weight transfer to get your sled moving. On a trail application, the front shocks are much more important. Also, if you spend a lot of time in the trees, I’d say to start with the fronts. If you’re riding a Ski-doo or Arctic Cat, I would start with the rear shocks, since I feel those shocks tend to fade and could benefit the most from improvement. There are other factors, like where you’re going to use the sled, how much you weigh, etc. We welcome you to call us and figure out a specific list for you.
Sway Bars?
So, on the 36” kit, we previously couldn’t get the geometry to fit, which is why we didn’t have it for the Pro chassis. We have a 36” kit for the AXYS this year, which has the sway-bar connections. My preference is sway-bar out. When you’re running our springs and shocks, I feel that we can tune the sway bar performance into the shock. The disadvantage to sway bars, is, if you understand energy, if you put energy into one side, via compression, you are transferring some of that energy to the other side. That works really well on the trail, because it removes some of body roll; it makes you have to put more rider input into the sled. However, when you get into the backcountry, that transfer of energy is working against you, and negating the effects of independent suspension. This will have a tendency to push you off course, if you hit something, or cross a track. Disconnecting the sway bar will stop that. A multi-rate spring will allow you to disconnect the sway bar, but still have the performance on the trail.
Are there quick-detach sway bars?
Some manufacturers make them. For Z-Broz, we find that people don’t use it, mostly men, and is generally overlooked. We have kind of forced the issue on our customers to run without the sway bar, but we have started putting the mechanics back into our front ends for those that want it. I think, as you learn to adapt to disconnecting the sway bar, there are way more advantages.
What is the service interval?
We recommend servicing our shocks every year, for most riders. The guys that are putting on 3,000 miles or more per year, might want to service twice a year. Some of it also comes down to the right setup. The wrong setup will create excessive heat and break down the oil, and can even melt nylon internals. For the mountains, we don’t really see that. Most of our mountain riders are changing the oil/servicing because of water contamination.
How do you get all of the old oil out/clean it?
We use air. Blow it off. Don’t use solvents. Dump it out, blow it off, and then flush with fresh oil. We also use Simple Green. It’s really important to get all of the water and contaminants out. We really recommend flushing with oil. It’s really difficult to get everything out, unless you send it to a shop.
What is typical spring life?
It depends on the material. Titanium, to me, is not worth the money. Nowadays, most of the quality wire is high-tensile chrome, and has a lot better memory. Titanium doesn’t fade, until it breaks. The newer wire, allows a higher quality spring, and has a lot better memory. You should easily get 5,000 miles out of a set of good springs, if they’re setup correctly.
Final Thoughts
There will always be some fine tuning in shocks, even if they’re a custom build. It might be as simple as pre-load or compression adjustments, or it might be more complex, perhaps some new springs. If you’re not bottoming the suspension out, it’s too stiff. Take some notes, and start making some adjustments in the field. If you’re constantly bottoming out, add some pre-load. If the ride height is too low, you need to change your springs. You can add SO much pre-load, you start fatiguing your springs. You run the risk of coil bind, where the coils come in contact with each other, and you run the risk of breaking.
Once you’re over ¾” to 1” of pre-load adjustment, in either direction, you need to buy new springs. With Z-Broz, we can easily adjust springs. And, with our triple-rate setups, the tuning is infinite. Our springs are setup with zero pre-load. The owner’s manual will tell you how many turns equals that ¾”-1” on factory shocks. In UTVs it can be more than that it really depends on how much stroke or travel the shock has and how long the spring is. Good Quality springs generally have a little over half there total length of deflection or in other words an 8” spring will have about 5” of total deflection before its coil bound.
We have products that allow a person to work with the factory shocks and still make adjustments. Going from a single-rate to a dual rate, or a higher quality spring, or maybe something that is more specific to your weight. The more pre-load you put in, the more stored energy is in your shock. This greatly affects your rebound. We want to minimize the stored energy, which is why we run no pre-load. You run the risk of breaking parts by introducing pre-load. The shock will now unload the energy in unpredictable ways. It can even go as far as lifting the chassis, much like a human on a trampoline.
COMMENTS
No comments yet.